WARNING! This post is extremely long and has LOTS of photos of my husband and I being big dorks. Proceed with caution!
I'm definitely REALLY behind on sharing these photos. You'd be surprised at how long it takes to write up these cosplay posts!
Hopefully by now you know the drill...Dave and I attend a video game convention in Boston every year-
PAX East. If you leave near Seattle you can go to PAX Prime, folks from San Antonio have PAX South, and friends in Melbourne can attend PAX Aus.
Have you ever played Borderlands? It's a first person shooter with a great storyline and really awesome artwork. Dave and I decided to make costumes for two of the characters from the sequel, Borderlands 2- Handsome Jack and Gaige.
Let's start with Gaige- she's a spunky Mechromancer and has a grungy costume which I knew would be SO much fun to replicate! The pic below shows her outfit, but also gives you an idea of the game styling:
The coolest part of her costume is definitely her mech arm...sweet!
Now onto the villain, Handsome Jack:
(Yes, what you see on his face is a mask)
As always, it is quite difficult to get good photos of ourselves at conventions. That's because we don't bring a camera when we are in costume, so we have to rely on scouring the 'net to find photos that other people have taken of us. Sometimes the photos are great, sometimes they are crappy phone photos.
Below are some of our favorite pictures, credited to sources where we found them. Continue scrolling for detail shots we took at home! :)
Photographer - Ken Hsu (he emailed these to us)
Photographer - Ken Hsu
Photographer - Ken Hsu
From our phone- we found some doppelgangers!
The rest of these are from local photographer Irina Varavina, who took a bunch of pics of us! More can be seen
here.
(that machine is from the game- it was in the lobby)
(With Dave's friend from work and her fiance)
Everything on our costumes had to be customized. All parts (items which were sewn from scratch, altered, or purchased) needed the "outline treatment." We really wanted the outlines to stand out like they do in the game. Looking back, I think we could have done even more to make the costumes look more cartoonish!
One of the most fun things to work on was my shoes- I bought gross Converse knock-offs at Target for under 10 bucks...here's the "before:"
Acrylic paint sure does wonders- here's what the shoes looked like after the first coat of paint went on:
You can also see the first coat on my tools. I bought cheap plastic children's tools and added the outlines and some "rust."
Apology
The detail pictures were taken when we got home from the convention- it was dark, and we were tired and lazy. Please don't blame me for the horrible quality!!!
Here are the finished shoes:
To make my holders for the tools, I created boxes from foam board, then sewed brown pleather sleeves to go around them. Everything was hot-glued into place.
I love my skirt! It's a wrap style (secured on the side with a button), and was my first time sewing box pleats. They were surprisingly easy!
If I forget to mention it later, I want the world to know that we went through at least a dozen Sharpies and oodles of acrylic paint to make everything look worn out and like a cartoon!!
Maybe not the coolest detail ever, but in case you were curious- here's my glove:
Also on that hand is a leather cuff thingie and a padlock bracelet.
I am IN LOVE with my Class Mod lunch box (when equipped it changes my stats). I took a South Park lunch box from the dollar store (ha!) and repainted it to look like hers:
The lunchbox served as a perfect "purse" for me to store my phone, keys, and some money.
Check out my stylish goggles:
I styled my wig into pigtails, by creating a special headband to wear underneath. The headband has two wire armatures coming off either side, and these were slipped through the mesh of the wig. This gave me a sturdy place to wrap the pigtails so that they would stay upright and not droop!
Necklaces (remember, this is the end of the day which is why my makeup is all smudgy!):
Earring:
Now....how in the world was I going to make that mechanical arm???
I went to the hardware store and grabbed aluminum flashing and cut out and shaped a bunch of different pieces to fit my arm and hand. The little finger joints were the hardest! I watched a LOT of episodes of Buffy while working on this :)
I taped the pieces to my hand so I could make sure it all fit together.
It was hard to get everything to fit closely enough that it would look like a real robotic arm, but also have enough room to let me move. I had to label all of the pieces so that once I took off the tape, I could successfully re-assemble!
Sweeeeeeet.
Above is also my handmade piston, and belt buckle. I sculpted the buckle from polymer clay, then painted it after it was baked.
In addition to sewing my skirt and shirt from scratch, altering the sweatshirt (including adding faux leather accents), I also sewed Dave's vest and altered all of his layers so that there was less bulk. You see, Dave has a tendency to get hot at conventions, and we wanted to make sure that he wouldn't be dripping with sweat by the end of the night.
Sorry there are no detail shots of Dave's completed costume- I can never get him to pose for any! However, I was able to snap this one of him with my phone while we were taking a little break at the convention:
Don't you love the watch and belt he made?!
So while I was working on sewing/painting/distressing...what was Dave doing? He was making us some freakin' AMAZING guns!!
He sanded, modded, and repainted Nerf guns. But wait- there's more! He put LED lights in them to make them GLOW!! Dave is awesome.
Here's a less glamorous shot of Dave's gun...
...but it has one amazing detail. Do you see the name, Randy Pitchford?
Well, he's the CEO and President of Gearbox, and developer of Borderlands 2. While we were walking around the convention, we saw him in the lobby! It's a good thing Dave recognized him, because I likely wouldn't have!!
He was SUCH a nice guy, and said that our costumes were the best Gaige and Handsome Jack he has ever seen! He was particularly impressed with my lunchbox :) Now, you may think he was just being nice, but after we took a picture with him on our phone, he told his wife to take a picture with her phone, and he posted us on his Twitter!!
We also had the pleasure of meeting Anthony Burch, one of the writers of the game (he stopped us as we walked by to tell us he loved our costumes!)
At the end of the night, I looked like a crazy punk rocker:
We had a blast!!
For other cosplay posts, please check out
NYCC '13 (Clobberella)
NYCC '12 (Black Widow and Hawkeye)
PAX East '12 (Beat and Gum)
NYCC '11 (Rogue and Gambit)
PAX East '11 coming soon
NYCC '10 coming soon
You guys can totally stop reading here. For our family who might be interested in seeing what we did the day that we weren't in costumes, please continue...
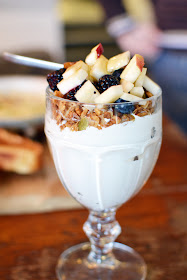
Breakfast at Tatte
Paint your own figures...here's mine:
This whole booth was paper for the PS Vita game, Tearaway:
Another Borderlands cosplayer:
Any Archer fans out there? This was the BEST cosplay of the whole convention!!!


-2.jpg)
-2.jpg)
-2.jpg)


