header

Pages

6.08.2012

Project on the App!

Hey there! Just popping to let you know I have a project on the CSS App today!


6.07.2012

fly away with me

Good morning! Today I am posting for My Thoughts Exactly, and my card features the wonderful new set, Up Up and Away.  These stamps are so cute, and the hot air balloon is fully customizable. Chevron, herringbone, plaid, polka dots, or just a plain outline- you can stamp it to suit the needs of your project!


This time around I went with the plaid....but it wasn't my first choice actually.  Below you can see the balloon I almost used. I was so excited to stamp each section a different color, but in the end, I preferred the more monochromatic look with the grey stamping.

(ignore the icky nail polish)

The colors just didn't look right with the card.  But what's good is that now you can see how easy it is to stamp the different colors into each section! (Plus I have a cute balloon to use on another project)

So glad you could pop in!

6.05.2012

CSS Release Review - Party Hop!

Please scroll down for my Runway Inspired post!
-------------------------------------------------------------

Today the wonderful DT from Clear and Simple Stamps is getting together to create an invitation and favor using some new and older product.

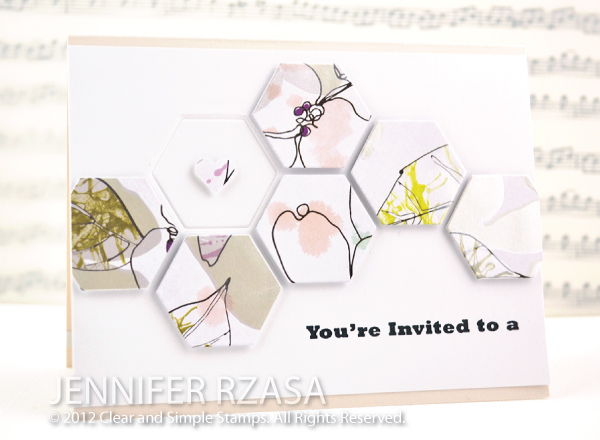
My party is a garden party:


I used some pretty floral paper, white, and cream:


 I just love those hexagon dies!

Here's the inside of the invite:


....and the favor, which holds tea! I thought that would be a perfect thing for guests to take home:


The rest of the DT has some fun in store:
Dana
Jaclyn
Kim
Laura
Laurie
Lori
Tracy
Clear and Simple Stamps

Also, if you get a chance, please vote for your favorite Gallery Idol card!


ric#13

It's time to get Runway Inspired!  Followers of the challenge voted for their favorite image for this week's challenge, and I think you will have so much fun if you choose to play along!

source: style.com


I embossed the houndstooth in black to mimic the shine from her leather pants.  I colored in the 3 rows of with a marker, and added a simple sentiment on a strip of yellow cardstock:


As always, stop by the blogs below for inspiration!
Aga
Angeline

PS.  It's Gallery Idol time, which means I will be reminding you each post to vote :)


6.04.2012

Gallery Idol!

(for my Clear and Simple Stamps post, please scroll down)
--------------------------------------------

Well.....here we go again!  I'm so happy to be in Gallery Idol again this year, and I'm super excited to share the card I made for this week.  The theme for this round is "You Color My World."  I love color gradients and when things are in rainbow order, so I knew this would be right up my alley.

When brainstorming ideas, I thought of the amazing artwork by Yulia Brodskaya.  She is the MASTER of paper!  I wanted to give a little nod to her work by incorporating some quilling into my project.  Only problem- I've never quilled!  Instead of doing the smart thing, and looking up how to do it, I decided to jump right in and wing it.  Here's how it went:

I adhered some die cut letters straight to a black card base


Next, I cut thin little strips of cardstock

Using a glue and some tweezers, I started making free-form loops and swirls, and adhering them down

Here is one finished letter:

I followed the same process for each letter, just making it up as I went, adding paper where I thought it would look good. 

It was hard to decide when I was done (I could have added like 20 more swirls!), but I stopped at this point:

Some close-ups:


The trickiest part was where the swirls intersect- make sure to "dry fit" the pieces before you glue them down.

Tip 1:  Use thin glue!  I started on the "h" with tacky glue, but it got a little globby.  Then I went with good ol' Elmer's, and that was a lot better!  If you want to know what real quillers use, I'm sure you could look it up, lol.

Tip 2: Thinner paper is better!  It's no wonder they sell special quilling strips. I used thin cardstock, and had to run my fingers over the paper many times to get it to smooth out.  In the end it worked out well, but I could have saved time/hassle with thin paper.

Now it's time to vote! You can check them all out, then pick your fave. You've got until Thursday, June 7 at noon MDT.  Thanks so much!! Contest info can be found here.

(in case you missed that first link...vote HERE!  I'll also leave the voting widget in my sidebar)

CSS Review Day 4

It's the fourth day of the review for Clear and Simple Stamps' latest release.  Today's focus is on sentiments and backgrounds...I used the Designer Lines set to make this cute card:


I put some soft blue felt behind the die cut window, and used complementary colors (blue and orange).

The DT is sure to have some fun projects too!

Laurie
Laura
Denise
Kim
Lori
Clear and Simple Stamps


6.03.2012

CSS Review Day 3

Welcome to the third day of the release review from Clear and Simple Stamps.  Today's focus is on the alphabets and numbers.

I made a fun tag that uses the wonderful letter and number dies....as well as one of the butterfly dies that were released last month:

With all of that glitter, how could I not upload to this week's CAS-ual Fridays challenge??


After I cut them out, I applied some glossy accents for a smooth and shiny look.

For more inspiration, visit the other ladies who are posting today!

Laurie
Kim
Laura
Tracy
Dana
Clear and Simple Stamps


Related Posts Plugin for WordPress, Blogger...